Sunday, April 24, 2011
Washington Society of Professional Engineers Scholorship
I got a $4000 college scholarship, the main reason being for my car project. That's almost the price of the project itself!
Started Building the Battery Regulators
To ensure i get maximum durability out of my batteries, i need to build simple battery regulators so the batteries get evenly charged.
Here's what I've done so far:
Here's what I've done so far:
Started Controller/Control Box Platform
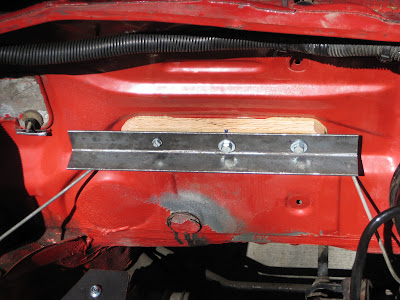
I plan on having a platform go from the racks to the back of the hood so i can bolt my control box and controller to it to secure them. So far i have mounted the shelf it will rest on, and made a metal skeleton of the platform. All that is left is to cut wood to fit on it, and get the skeleton welded.
Bolted in Front Battery Racks
The front rack is now a solid part of the car. All that's left to do with them is make a wood box to secure the batteries on the rack.
Tuesday, April 19, 2011
Motor is finally Mounted
I bolted in the new motor mount and it fits perfectly. That motor isn't going anywhere. Now i'm working on getting the battery rack mounted.
Pictures:
Pictures:
Start Crimping the Battery Cables
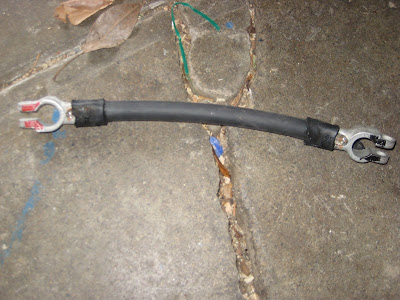
In the past few days I have been cutting, crimping and heatshrinking the battery cables that will go from the + of one battery to the - of another. I will also need to crimp terminals on all the other cables that will bolt on to a component.
To do this I strip the cable, slide the terminal on, stick it in the hammer crimper and hammer it with a sledge 4 or 5 times. Then i slide some heat shrink on and use a propane tank to shrink it around the crimp, making it better insulated and more durable.
Pictures:
To do this I strip the cable, slide the terminal on, stick it in the hammer crimper and hammer it with a sledge 4 or 5 times. Then i slide some heat shrink on and use a propane tank to shrink it around the crimp, making it better insulated and more durable.
Pictures:
Front Battery Rack and 3rd Motor Mount Complete!
My fabricator finished both the front racks and final motor mount while i was on spring break. The look great!
Pictures:
The 3rd mount will attach to the left of the motor and the back left corner of the hood.
As for the front rack, it will bolt in in-front of the motor/tranny and then have a thin wood covering to protect the terminals
Pictures:
The 3rd mount will attach to the left of the motor and the back left corner of the hood.
As for the front rack, it will bolt in in-front of the motor/tranny and then have a thin wood covering to protect the terminals
Subscribe to:
Comments (Atom)


