


Saturday, July 9, 2011
Good News on Controller
Heard back from Paul in Seattle. He was able to fix my controller, and I will be able to pick it up Wednesday before my UW orientation. Turns out i blew the 4th mosfet, which in turn blows the 3 in the chain before it. Its only a couple bucks to replace, and everything should be up and running soon!
Wednesday, July 6, 2011
Started the Charging Outlet
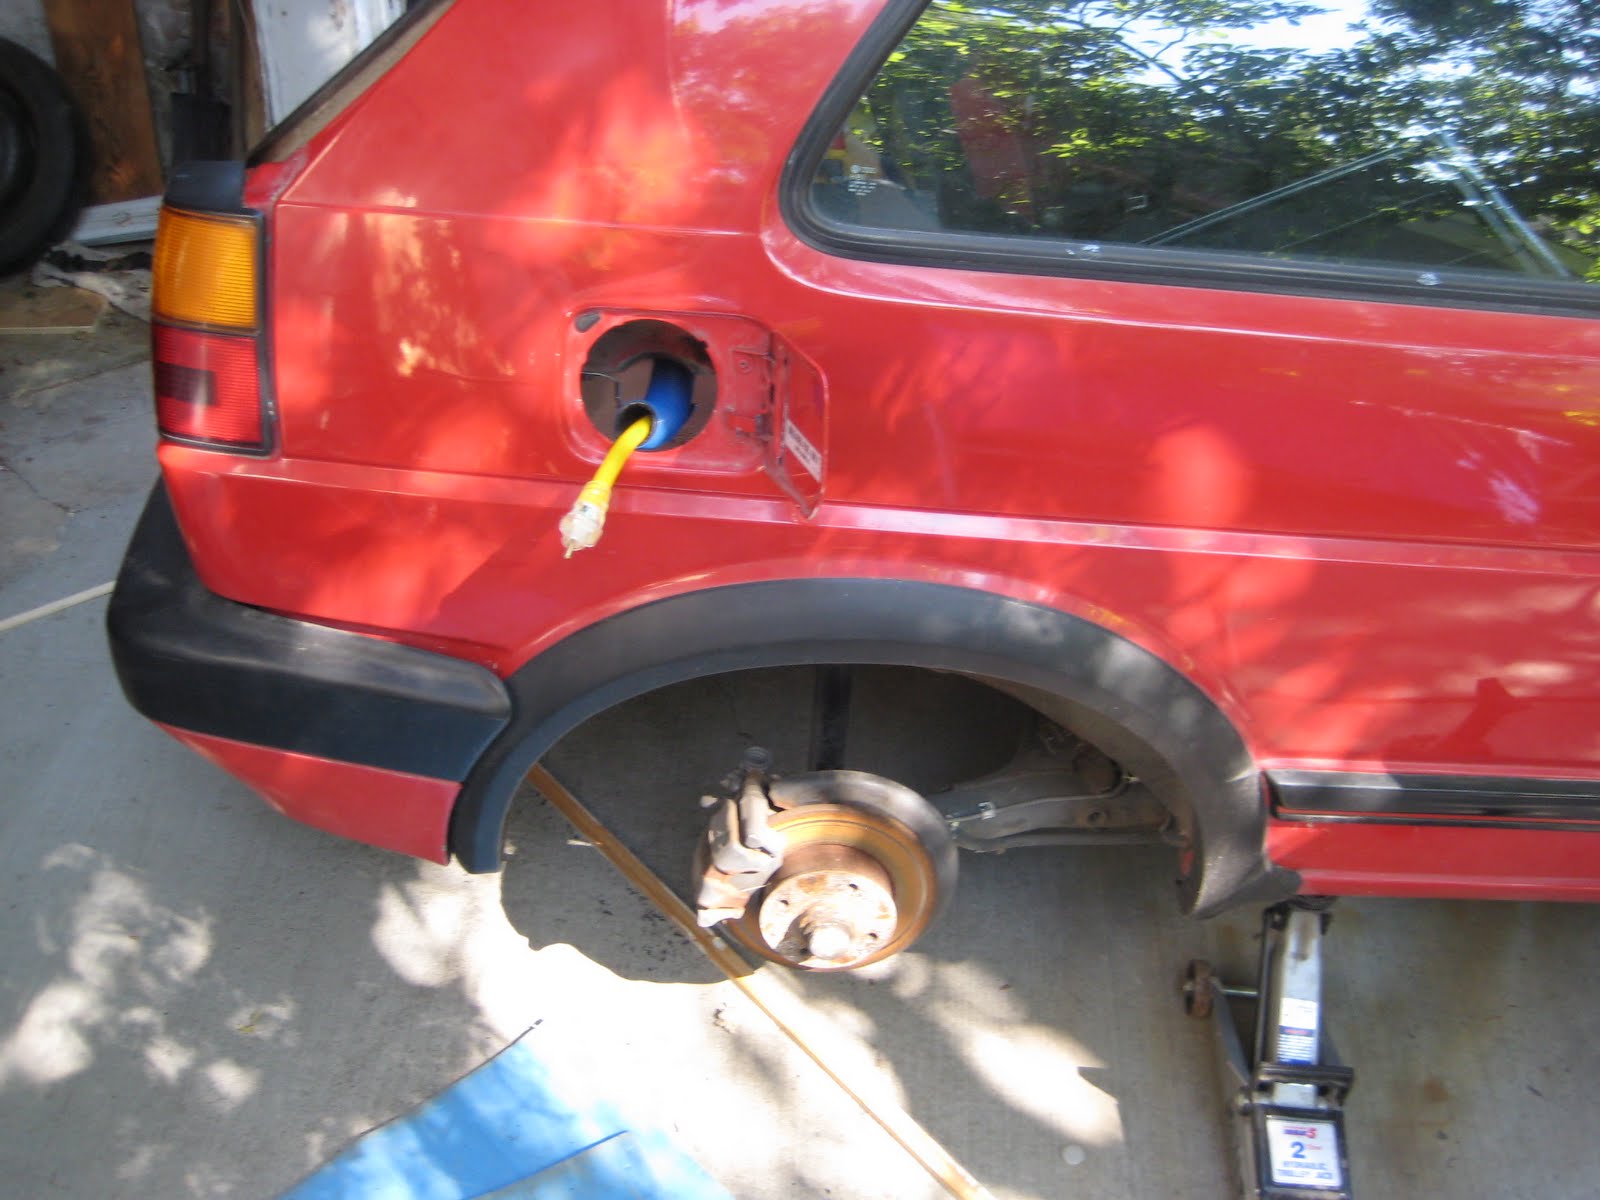
To charge the car i will open the gas door and plug in an extension cord. The outlet will be wired to both the 12v and 120v chargers, as well as a safety ignition lock system that wont let me drive away when the car is plugged in.
Using hot tub hosing, some pvc and some plexi glass we began fabricating a a mount for the outlet.
Here is what we have so far


Using hot tub hosing, some pvc and some plexi glass we began fabricating a a mount for the outlet.
Here is what we have so far


Finished Control Box
With everything wired up and in place, I was able to finish, and tidy up the control box, which houses all of fuses and small ev components. The only thing that will be added is the wires vacuum brake for the vacuum brake.
Here it is!


Here it is!


Installed Heater
We got the heater back in and wired it to a switch so that it can only be turned on when the fans are going. I tested it and it is much more efficient than a regular car heater. It gets hot in a few seconds! I also made sure it didn't melt anything when it was on.
Monday, July 4, 2011
Mounted Gauges and Installed Precharge switch
I mounted the gauges and wired them to blue leds so they are lid at night with the rest of the dash. They look pretty nice on the dash.
I also added a precharge switch right between the defog and hazards, which i push and hold for 5 or so seconds to "warm up" the car before i actually start it. This adds longevity to the components, especially the controller
Finally i installed the switch for the heater below the hazards, but haven't wire it yet. I'm thinking about getting a different one the lights up when the heater is on.

Family is in Town! First Test!
Grandma, Grandpa, Greg and Deb came in town for my graduation, but they also were there to witness the first test.
Before i was ready to test, i had a list of little things that needed to be done. Between me, my dad and Greg, we were able to get everything done well.
This includes...a mount to secure the throttle cable, all of the high voltage wiring (crimped and ready to go), and much more.
When we were finally ready, we hooked everything up to a 12v Battery and turned the car on and tested the motor in all of the gears. The test was a SUCCESS.....until the controller melted down...
Here is a video of the excitement.
First Test from Jake Garrison on Vimeo.
What ended up happening is something that wasn't secured well on the controller overheated, causing the controller to malfunction. I ended up sending the controller back to Paul (the designer) and he is working on it as we speak, and i will pick it up in Seattle when i go to my UW orientation. Even though it is a set back, i have been able to get many other things on the car down while i wait.
Anyways...it was great to show everyone that the wheels CAN spin, and i think they all enjoyed watching and helping me out.
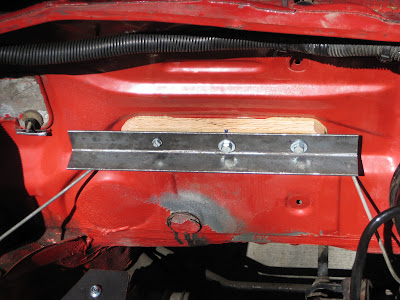
Made Lid for Back Box
My dad made a nice stained wood lid with plexi-glass through it so i can see the lights associated with the chargers. It looks great. All that's left in the back is to run a few wires through the car (for the chargers) and drill a hole through the rear passenger side fender to run a cable to the gas cap door, where the charging plugin will be located


Sorry....Haven't Been Blogging
I've been having a great summer and keep forgetting to update the blog. There has been alot of work done, and it's almost drive-able now!
Sunday, May 22, 2011
Finished Back Battery Box
Built, painted, carpeted, and mounted the box for the 4 batteries and the charger. All that is left is to build the top which will be out of nice stained wood. We also drilled the holes for the cables under the car to connect to the batteries.
The back is pretty much ready to go, now i just need to finish the front.


Ran the Cable Under the Car
Today we manged to get both the + and - cables wired from the trunk batteries to the front ones. To do this we put the cables in protective conduit and ran it through clamps that we mounted under the car. It was alot of work, but it will keep the cable organized and protected.


Sunday, May 1, 2011
Painted the Front Racks and Platform
Got some rust and water proof paint and painted the wood and metal used in the front battery rack and platform
Pictures:


Pictures:


Sunday, April 24, 2011
Washington Society of Professional Engineers Scholorship
I got a $4000 college scholarship, the main reason being for my car project. That's almost the price of the project itself!
Started Building the Battery Regulators
To ensure i get maximum durability out of my batteries, i need to build simple battery regulators so the batteries get evenly charged.
Here's what I've done so far:


Here's what I've done so far:


Started Controller/Control Box Platform
I plan on having a platform go from the racks to the back of the hood so i can bolt my control box and controller to it to secure them. So far i have mounted the shelf it will rest on, and made a metal skeleton of the platform. All that is left is to cut wood to fit on it, and get the skeleton welded.


Bolted in Front Battery Racks
The front rack is now a solid part of the car. All that's left to do with them is make a wood box to secure the batteries on the rack.


Tuesday, April 19, 2011
Motor is finally Mounted
I bolted in the new motor mount and it fits perfectly. That motor isn't going anywhere. Now i'm working on getting the battery rack mounted.
Pictures:


Pictures:


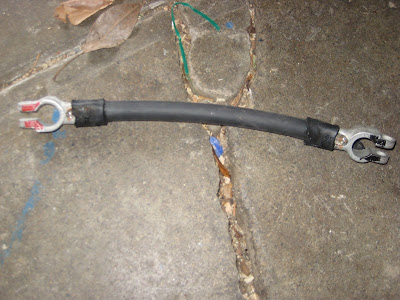
Start Crimping the Battery Cables
In the past few days I have been cutting, crimping and heatshrinking the battery cables that will go from the + of one battery to the - of another. I will also need to crimp terminals on all the other cables that will bolt on to a component.
To do this I strip the cable, slide the terminal on, stick it in the hammer crimper and hammer it with a sledge 4 or 5 times. Then i slide some heat shrink on and use a propane tank to shrink it around the crimp, making it better insulated and more durable.
Pictures:


To do this I strip the cable, slide the terminal on, stick it in the hammer crimper and hammer it with a sledge 4 or 5 times. Then i slide some heat shrink on and use a propane tank to shrink it around the crimp, making it better insulated and more durable.
Pictures:


Front Battery Rack and 3rd Motor Mount Complete!
My fabricator finished both the front racks and final motor mount while i was on spring break. The look great!
Pictures:


The 3rd mount will attach to the left of the motor and the back left corner of the hood.
As for the front rack, it will bolt in in-front of the motor/tranny and then have a thin wood covering to protect the terminals
Pictures:


The 3rd mount will attach to the left of the motor and the back left corner of the hood.
As for the front rack, it will bolt in in-front of the motor/tranny and then have a thin wood covering to protect the terminals
Tuesday, March 22, 2011
Batteries Came!!
Today i picked up my batteries and they look great! Im excited to test them out with the car


Tuesday, March 15, 2011
Installed the Second of Three Motor/Tranny Mounts
I was able to modify the orignial front engine mount to fit with the tranny and adapter plate. The solution was to use 13 washers as spacers to make up for the 5/8th inch gap that the engine had one filled. Now the tanny is mounted almost identicle to the way it was before i removed the engine, which will ensure good preformance.


The final mount will for sure have to be fabricated. Since the motor will have so much torque, by latest plan will be to have a solid metal mount that starts on the other, unused face of the motor and attaches to the back left engine mount. This way the motor will not go anywhere, but still have a bit of room to vibrate in, which is good. One issue with this plan is the axle intersects with where i want to cross the mount, so i will have to make it curve around where the axle is.


The final mount will for sure have to be fabricated. Since the motor will have so much torque, by latest plan will be to have a solid metal mount that starts on the other, unused face of the motor and attaches to the back left engine mount. This way the motor will not go anywhere, but still have a bit of room to vibrate in, which is good. One issue with this plan is the axle intersects with where i want to cross the mount, so i will have to make it curve around where the axle is.

Cleaned Up Wireing Under the Hood
I was getting tired of all the extra connectors and wires that originally hooked to the engine, so i decided to remove them and tidy up the wiring i needed to keep. The only wires i have left are for the various lights and signals, the horn, ground, and the battery. Much more simpler.
Before:
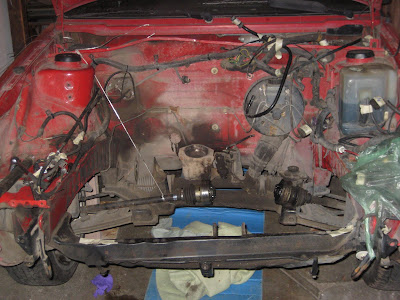
After:


Before:

After:


Sunday, March 13, 2011
Started the Battery Racks
We measured how much space i had under the hood for batteries and found i could fit 5 across between the motor and the front grill. We then constructed a wooden box that was the same dimensions as five batteries lined up and attempted to place it in the car.
The box didn't fit right away, but with the help of a hammer, we widened out the sides of the hood and made it fit.
Now that i have a good template i can make plans for the real thing.

The box didn't fit right away, but with the help of a hammer, we widened out the sides of the hood and made it fit.
Now that i have a good template i can make plans for the real thing.

Connected the axles to the Tranny
Yesterday i connected the axle hubs the the transmission hubs. It went much smoother than i thought.
Now when you turn the motor, the wheels spin!
The motor still needs to be mounted securely though. That's the next big step


Now when you turn the motor, the wheels spin!
The motor still needs to be mounted securely though. That's the next big step


Tuesday, February 22, 2011
Ordered the Batteries
I'm finally ready for the batteries, so i put in the order. They should arrive within two weeks, then i can get started on the boxes.
Sunday, February 6, 2011
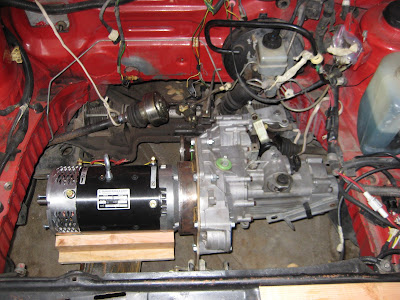
Got the Tranny In!
Today we lowered the motor/tranny into the hood and after some wiggling, we managed to get the tranny bolted onto its original mount. We then used blocks and car jacks to secure the motor side since there are no mounting points for it yet. The next step is to develop a method of mounting the motor permanently to the car


Sunday, January 30, 2011
Preperation for Mounting the Motor/Tranny
We ended up scoring a deal on an engine lift, and put it together today
Here are some pics:


Once it was set up, we put the motor and tranny togther, hopefully for good, and next we will lower it into the hood and mount it. The whole thing weighs close to 300 lbs, so it was tricky to get it togther and lined up properly.


Here are some pics:


Once it was set up, we put the motor and tranny togther, hopefully for good, and next we will lower it into the hood and mount it. The whole thing weighs close to 300 lbs, so it was tricky to get it togther and lined up properly.


Subscribe to:
Posts (Atom)